To add drivers on OTO Flex, navigate to Home page and click on OTO Flex then click on "Add Driver"
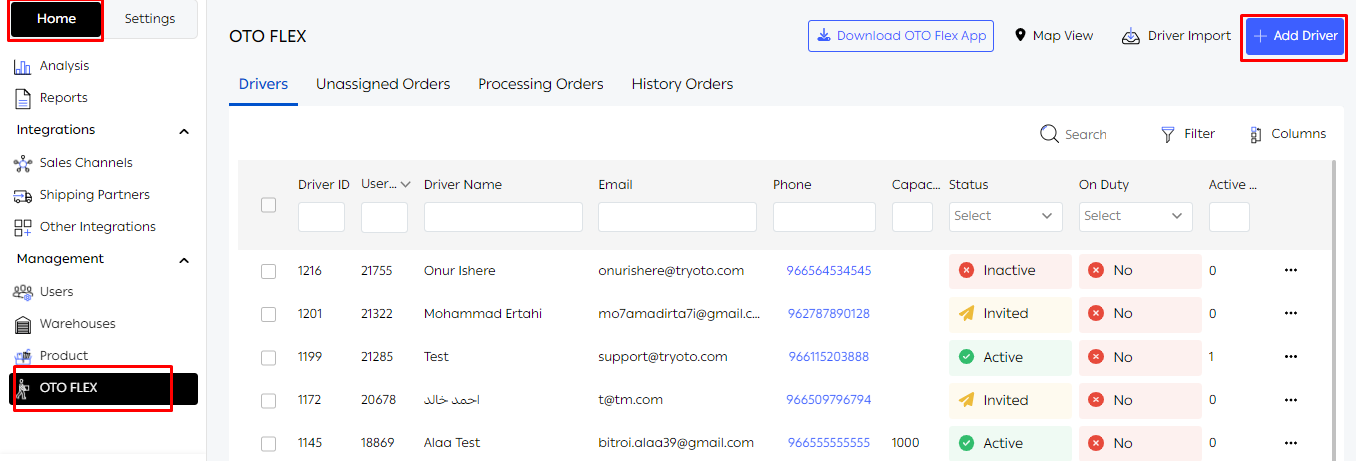
To edit the driver details like Name, Email, Phone number, click on the three dots next to the driver name then choose "Edit Driver"

To reset the Password for OTO Flex App, click on the three dots next to the driver name and choose "Share Reset Password Link"
To download the driver app, go to Google Play or App Store and search for Oto Flex. Just install the application and start to enjoy the comfort it provides for your fleet.
OTO Flex App in Details
After downloading the app your driver can start using it with the username and password you will provide to him.
New Orders tab
Incoming orders are visible under this tab. Your driver can choose the orders within the order list here. After selecting the order and accepting it by sliding the switch button, this order will be visible under the tasks tab. Map view is also available here for the orders.

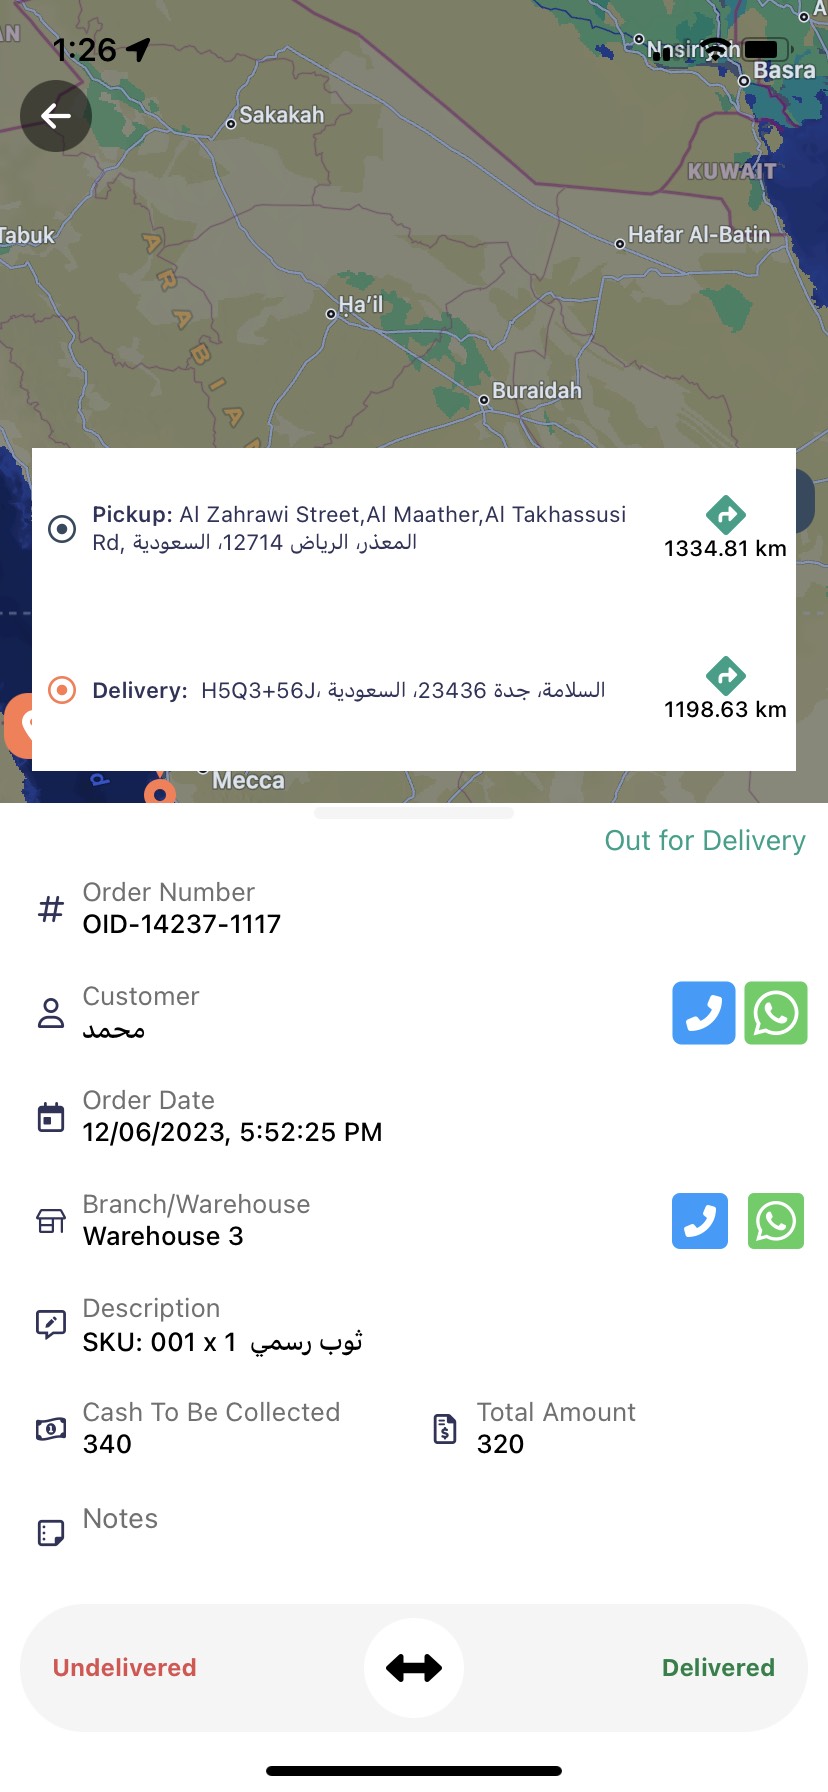
Order Menu
When you select an order from a list, the order menu will appear. You can see the following details, of the order, within this menu: Order number, status, pickup location, customer name, address, mobile number, COD amount, and other notes about the order.
From this menu, they can contact customers or your store with one button and can navigate to the pickup and delivery location easily.
There is a switch button at the bottom here that allows the driver to take certain actions, such as, accepting an order, starting the task, picking it up, starting the delivery, confirming that it is delivered or that the attempt is failed... All these actions should be logged in with this switch button. As soon as the driver uses this button he updates the status of the order in the OTO environment.

Here is how to navigate these actions and what they indicate:
Accepting an order
Under the New Orders tab, you can see the list of the orders. Their status is ”searching driver”. After selecting an order from this list you will be taken to the order menu. At the bottom, you can see the switch button. Just slide it to the right to accept the order. When a driver does that the shipment is created.
Starting a task
After accepting a task you can start or cancel it from the order menu. Slide the switch button right to start the task. The status will change to “Going to pick up”.
Picking up
After starting the task, the driver then should pick up the package from the pickup location. The pick-up location is available under the order menu and the route can be created by clicking the direction icon. After picking the package up, drivers should slide the switch button to the right again. The app can force the driver to create proof of the pickup. That is up to your settings. The status changes to “picked up” after sliding the switch button to the right.
Canceling a task
Before picking up the package drivers can cancel the task by sliding the button to the left. This action will change the status back to “Searching driver” and the order goes back under the New Orders tab.
Starting delivery
As soon as the driver picks the package up, he can start the delivery process. The delivery location is available under the order menu and the route can be created by clicking the direction icon. Slide the switch button to the right to change the status of the order to “Out for delivery”. At this stage, you can return the order by sliding to the left.
Failed delivery attempts
When a driver is out for delivery for the first time and fails to deliver the package for any reason, he can mark the order as “Undelivered”. In order to do that just slide to the left. A dialogue box will open to choose the reason for the failure. Choose the proper reason to take the necessary action.
Successful Delivery
If the delivery attempt is successful then the switch button should be slid to the right to confirm the delivery. The app may ask you for proof of delivery with a photo or OTP, depending on your settings.
Return Order
Drivers can return the order after they picked it up. When the return is an available option, it will be visible on the left side of the switch button. Slide the button to the left. A dialogue box will appear to enter the reason for the return.
Tasks tab
After your driver accepts a task it will appear here. He can see the tasks assigned to him and their current status.
By selecting the orders picked up.
History tab
Drivers can see the list of tasks they completed under the History tab. Successfully delivered orders and returned ones are listed here.

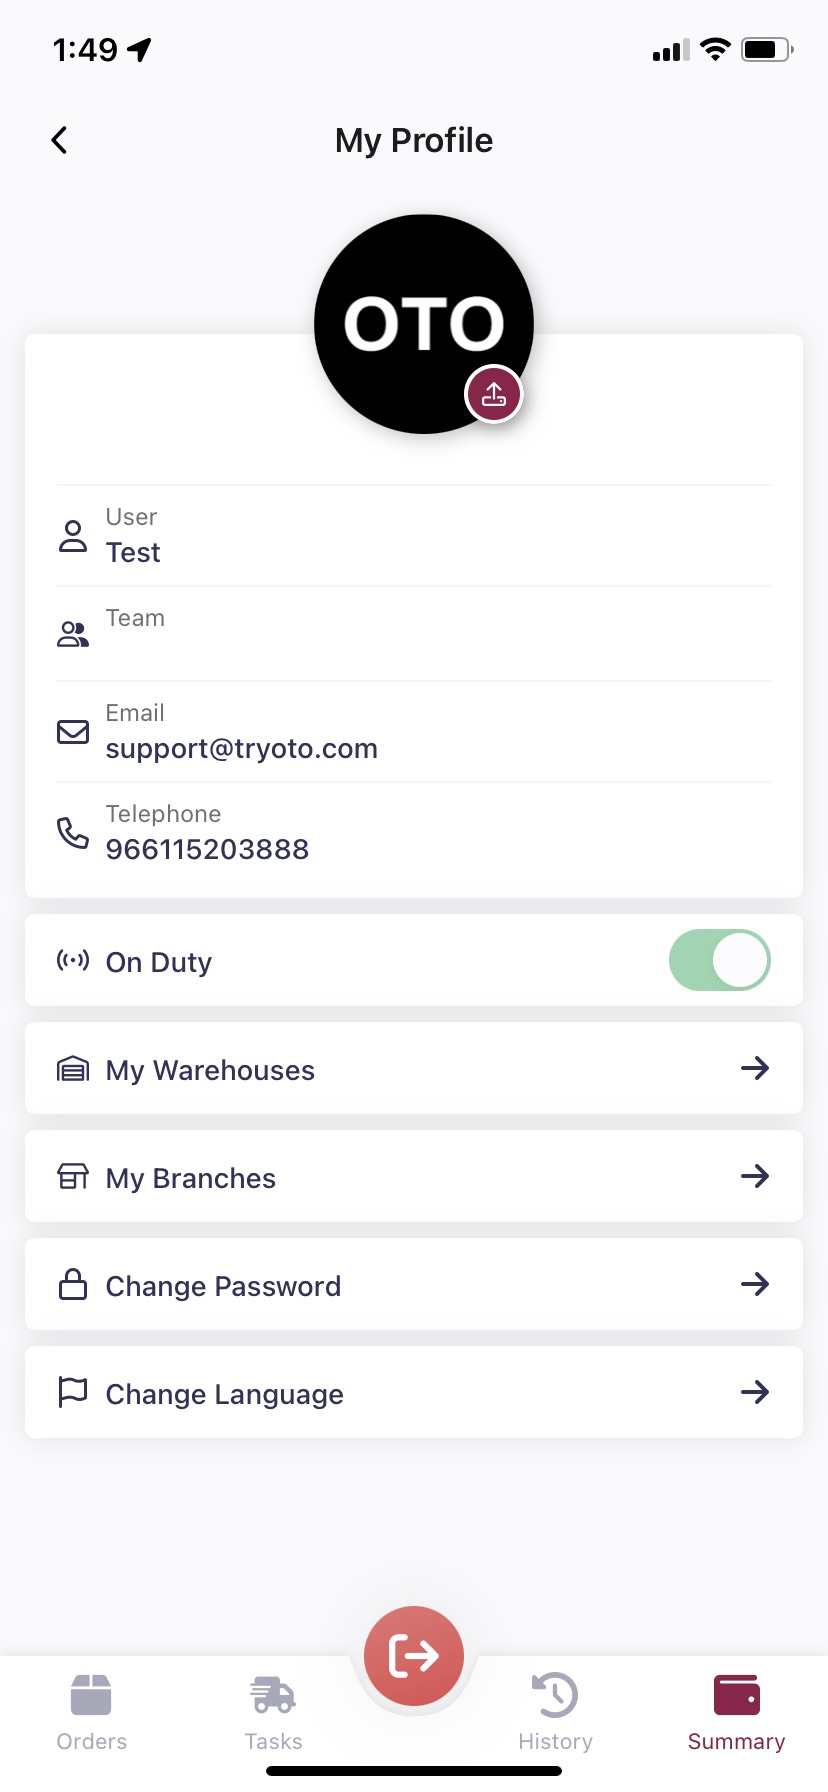
Summary Tab
Drivers’ settings can be configured under the Summary tab. Drivers can also see here the branches and warehouses that they are working for. Changing passwords is possible here. They can turn on their status to active or inactive with the on-duty switch button here.
Creating a delivery proof
Creating proofs is the daily routine of delivery operations. They are very easy with Oto Flex. You can create proofs both for pickups and deliveries. Delivery proofs may be created by photos or passwords (OTP).
You can force delivery proofs so that the app makes them obligatory to change the status of an order. When a driver slides to change the status to picked-up or delivered a dialogue box appears to remind him to create a proof.

Reasons for a failed delivery attempt
Unfortunately, some delivery attempts are failed due to the nature of the business. It is crucial for you to know the reason.
When a driver changes the status to undelivered, a dialogue box opens, and the driver chooses the reason so that OTO keeps track of these reasons to provide you with the necessary reports.

Was this article helpful?
That’s Great!
Thank you for your feedback
Sorry! We couldn't be helpful
Thank you for your feedback
Feedback sent
We appreciate your effort and will try to fix the article